High resolution rendering with Processing, Part 2

This is the second post in a series. Check out the first if you haven't already: High resolution rendering with Processing, Part 1.
So in the previous post we looked at how we could render to targets bigger than our screens in a practical way. If you have an iterative and computationally expensive process like me, you may have experienced that this can get quite slow, and would like a way to to a quick draft before committing to the full render.
If your process is completely predictable, you could just quit, edit some variable, launch again and render the big one, but that's not as sexy. Also, if you have random elements, you might want to redo an exact variant you stumbled upon.
With that in mind, let's tweak our sketch and make it smarter.
Let's get random
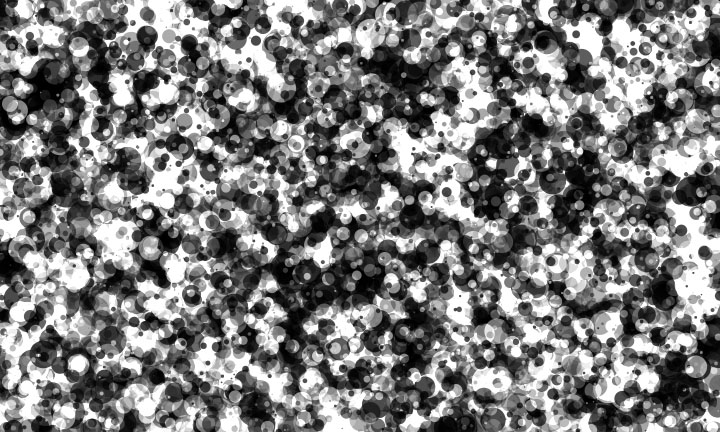
As an example where this method comes in handy, we'll use a random generative process for creating our awesome art. The output will be something like this:

Building upon the code from the previous post, the draw function is updated with some magic:
boolean firstFrame = true;
void draw() {
  render.beginDraw();
  if (firstFrame) {
    firstFrame = false;
    render.background(255);
  }
  doSomethingMagical(render);
  render.endDraw();

  // Render to screen, see previous post
}

int maxRadius = 50;

// No actual magic involved
void doSomethingMagical(PGraphics r) {
  if (maxRadius == 0)
    return;

  r.noStroke();

  r.blendMode(MULTIPLY);
  r.fill(random(64, 192));
  for (int i = 0; i < 100; ++i) {
    float radius = random(maxRadius / 10, maxRadius);
    r.ellipse(random(0, renderWidth), random(0, renderHeight), radius, radius);
  }

  r.blendMode(ADD);
  r.fill(random(16, 128));
  for (int i = 0; i < 100; ++i) {
    float radius = random(maxRadius / 10, maxRadius);
    r.ellipse(random(0, renderWidth), random(0, renderHeight), radius, radius);
  }

  --maxRadius;
}
So, to sum up, we initialize the render buffer in the first frame with a white background. Every frame after that, we render 100 dots with blend mode MULTIPLY in a random brightness and random limited radius, then render a 100 dots with blend mode ADD in the same way.
Every frame, the maximum allowed radius of the dots is reduced, until it is zero, and no more dots are rendered.
After you've wasted an hour looking at this in action, we can continue with the actual purpose of this tutorial, switching between high and low resolution rendering.
Always draft before you draw
To start up, we can add another variable, called previewDpi and set it to 72, somewhat suitable for screen previews, and a boolean to toggle high/low res rendering.
int previewDpi = 72;
boolean renderHighRes = false;
We also add a method for resetting the state, and call this from our setup method.
void setup() {
  size(1024, 1024);
  doReset();
}

void doReset() {
  int dpi = renderHighRes ? printDpi : previewDpi;
  renderWidth = printWidth * dpi;
  renderHeight = printHeight * dpi;

  render = createGraphics(renderWidth, renderHeight);
  firstFrame = true;
  maxRadius = 50;
}
To make use of this, we add a couple of keyboard shortcuts:
// In keyPressed method's switch statement
    case 'r':
      renderHighRes = false;
      doReset();
      break;

    case 'h':
      renderHighRes = true;
      doReset();
      break;
Now, pressing r will trigger a new render in low resolution, and pressing h will trigger a new render in high resolution. Try it out!
When you do, you may notice some flaws. Firstly, the high and low resolution renders have different results, since our dots are rendered with a hard coded max radius of 50 pixels. This will look different on a 1000 by 1000 pixel canvas and a 10000 by 10000 pixel canvas.
Secondly, the high resolution image does not actually preserve what you saw in the low resolution image.
Let's fix the first thing first.
Scaling for size
We need to add a factor that takes the output size into account. One simple way is to take the current DPI and divide by the preview DPI, and use that factor everywhere it matters. So add this to the doReset method.
// In global declarations
float scaleFactor = 1;

// In doReset()
scaleFactor = dpi / (float)previewDpi;
Then we can use it to scale our dots.
float radius = random(maxRadius / 10, maxRadius) * scaleFactor;
Much better.
Reproducing the same random result
As you may know, randomness in programming is often not truly random, and a sequence of random numbers can be reproduced as long as you know the seed. This is they key to reproducing the same result in a bigger version.
So to do this, we select a seed based on some value, say current system time millis, and seed the random number generator before we start.
// In global declarations
int seed = 0;

// On hotkey 'r'
seed = (int)System.currentTimeMillis();

// In doReset()
randomSeed(seed);
Now, whenever you press r, a totally new low resolution image will be rendered. And when you see something you like (for instance, an improved black and white version of the Mona Lisa), you can hit h and regenerate the exact same image with higher resolution.
To verify, save a low resolution version, generate the high resolution version, save, and compare. There you go!
Summary
To summarize the key points:
- Toggle high and low resolution with keyboard shortcuts
- Control randomness with a preselected seed
- Use a scale factor where using hard coded size values
Shout out if you have any question or feedback!
Code listing
For your convenience, here's a gist with the full code.